膨胀图像
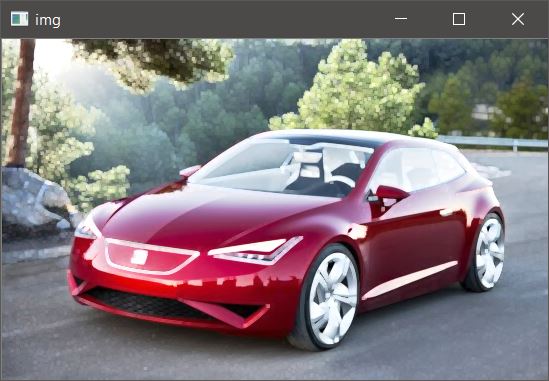
这个是本次示范中使用的原图:
.jpg)
原图
膨胀与侵蚀图像相反。 这是OpenCV代码。
#include <opencv2/opencv.hpp>
#include <iostream>

using namespace cv;
using namespace std;

int main(int argc, char** argv)
{
    // 读取图像
    Mat image = imread("Lotus.jpeg");

    // 检测失败
    if (image.empty())
    {
        cout << "Could not open or find the image" << endl;
        cin.get(); //等待键盘
        return -1;
    }

    //使用3x3核心膨胀图像
    Mat image_dilated_with_3x3_kernel;
    dilate(image, image_dilated_with_3x3_kernel, getStructuringElement(MORPH_RECT, Size(3, 3)));

    //使用5x5核心膨胀图像
    Mat image_dilated_with_5x5_kernel;
    dilate(image, image_dilated_with_5x5_kernel, getStructuringElement(MORPH_RECT, Size(5, 5)));

    //创建窗口
    namedWindow("原图");
    namedWindow("3x3核心膨胀图像");
    namedWindow("5x5核心膨胀图像");

    // 显示图像
    imshow("原图", image);
    imshow("3x3核心膨胀图像", image_dilated_with_3x3_kernel);
    imshow("5x5核心膨胀图像", image_dilated_with_5x5_kernel);

    waitKey(0); // 等待键盘

    destroyAllWindows(); //毁灭窗口

    return 0;
}
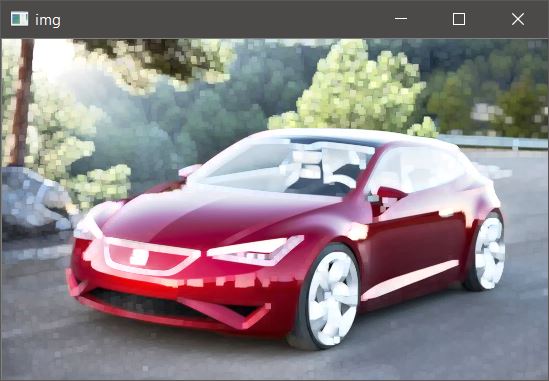
使用3x3核心膨胀图像
使用5x5核心膨胀图像
void cv::dilate(InputArray src, OutputArray dst, InputArray kernel, ] Point anchor = Point(-1,-1), int iterations = 1, int borderType = BORDER_CONSTANT, const Scalar & borderValue = morphologyDefaultBorderValue())

通过使用特定的结构元素来放大图像。
该函数使用指定的结构化元素来扩展源图像,该结构化元素确定要对其取最大值的像素邻域的形状

参数
	src - 输入图像;通道数可以是任意的,但深度应为CV_8U,CV_16U,CV_16S,CV_32F或CV_64F之一。
	dst - 输出图像的大小和类型与src相同。
	kernel - 用于膨胀的结构元素;如果element = Mat(),则使用3 x 3的矩形结构元素。可以使用getStructuringElement创建内核。
	anchor - 锚在元素内的位置;默认值(-1,-1)表示锚点位于元素中心。
	iterations - 施加腐蚀的次数。
	borderType - 像素外推方法
	borderValue - 边界不变时的边界值